Ever wondered if there are picture hangers that are beginner-friendly? You know, the type of hangers that can be successfully installed with just two simple steps?
The answer is YES!
In fact, there are more options than we expected. This just goes to show how easy picture hanging can be, even if it's your first time. In this article, we want to introduce you to 7 picture hangers and wall hooks that are super easy to install.

The list below is categorized into three sections: Frame Hardware, Hooks, and Screws. To help you understand these categories better, check out the brief descriptions below:
- Frame Hardware refers to products attached to the back of the frame.
- Hanging Hooks refer to products used for hanging on the wall or ceiling.
- Screws for Hanging refer to the products used for hanging frames on the wall.

Metal Frame Euro Hanger
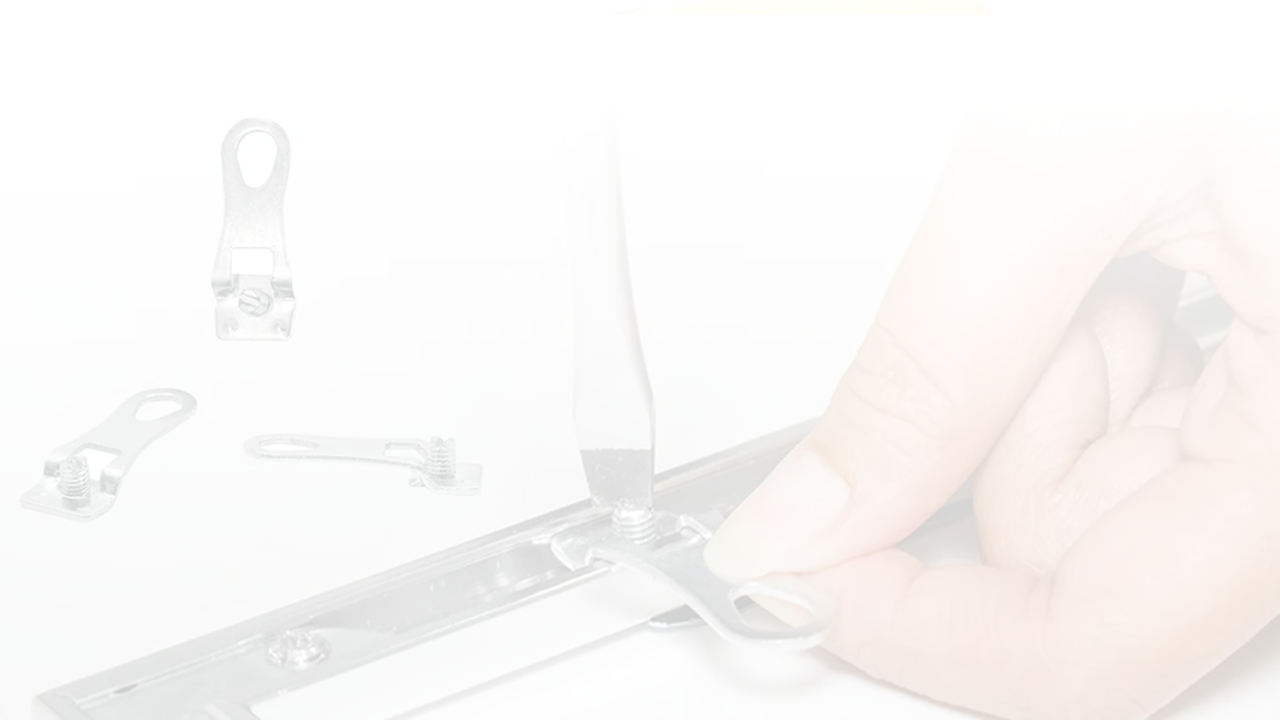
Another type of frame hardware is the Euro Hangers, specifically designed for metal picture frames. You might wonder why there are specific hangers for wood and metal frames, and the reason is that they are constructed differently.
Wood frames are typically pierced by foreign objects such as screws, nails, or hangers with prongs. In contrast, metal frames have an angled, open-type channel into which you can insert the picture hangers into, without penetrating the metal.

If you're working with a metal frame that doesn't come with a hanger, the Metal Frame Euro Hanger is an excellent choice. To install it, insert the Euro Hanger onto one side of the frame and use a screwdriver to secure it. Repeat the process on the opposite side if you're using two hangers.
🔎 RELATED ARTICLE: Everything You Need to Know About Metal Frame Picture Hangers

Nailess Sawtooth Hangers
First up, we have nailless sawtooth hangers. These hangers are designed for the back of a lightweight wooden frame. As the name suggests, this product features sawtooth-like edges with two prongs on each side. These prongs are designed to penetrate the wood and securely hold the frame on a screw or nail that you install on the wall.
To install nailless sawtooth hangers, align the hanger in the center of the frame's top side and then gently tap it with a hammer until it's securely in place.
🔎 READ MORE: Do’s and Don’ts When Using Sawtooth Hangers

Screw Eye Hanger
We've reached our last beginner-friendly picture hanging hardware – the Screw Eye Hanger which is used on frames. You've likely encountered these in various sizes before, including small, standard, and large ones.
However, for picture hanging purposes, we have thoughtfully selected the following sizes:
- Large Screw Eye Hanger 210.5
- Medium Screw Eye Hanger 214.5
- Small Screw Eye Hanger 216.5
Screw Eye Hangers are intended for light-duty applications. For instance, you can use them to secure the back of a small and lightweight canvas art piece in order to attach picture hanging wire.

Brass Hooks
Moving on to hanging hooks, let's introduce a classic, no-fail, and beginner-friendly category of picture hangers: Brass Hooks!
You can use these for various applications, whether you're hanging picture frames, art pieces, or mirrors. There are multiple variations of Brass Hooks available, allowing you to choose based on the weight of the object you plan to hang on the wall.
Here are some Brass Hooks variations along with their corresponding weight capacities:
- Brass 10 lb Hooks
- 20 lb One-Step Hanger
- Brass 30 lb Hooks
- Brass 50 lb Hooks
- Brass 100 lb Hooks
- Tremor Hooks 30 lb
- Tremor Hooks 75 lb
For any of these hooks, all you need to do to install them on the wall is first, position them where you want them to be. Then, use a hammer to gently tap the nails and secure the hook in place. Voilà, you're done!

Hardwall Plastic Hook
Similar to Brass Hooks, we also have Hardwall Plastic Hooks. Both share the concept of being wall hooks with nails. The key difference is that Hardwall Plastic Hooks come with built-in nails ready for tapping, whereas Brass Hooks do not.
Additionally, Brass Hooks are designed for drywalls, while Hardwall Plastic Hooks are suitable for hard surfaces such as concrete, cement, cinder block, thin plaster over concrete, soft smooth brick, soft stone, and hardwood.
Regarding sizing, there are small and large variations available. We recommend using the small Hardwall Plastic Hook for objects weighing 20 lbs or less, and the large Hardwall Plastic Hooks for objects up to 30 lbs.
To install, simply position the hook on the wall and gently tap the three nails simultaneously until they are flush with the hook. It's as easy as pie, right?

Drop Ceiling Grid Hooks
Moving away from walls, did you know we also have specialty hooks designed specifically for drop ceiling grids? You may have come across this type of ceiling in offices, libraries, or classrooms. As the name suggests, drop ceiling grids consist of a series of squares above you. They serve as secondary ceilings that are easy to install and require minimal maintenance.
🔎 READ MORE: What Is A Drop Ceiling Hook and How To Install It
In any establishment, whether residential or commercial, there will likely be a need to decorate at some point, right? More often than not, people tend to decorate the walls, countertops, or even utilize floor space for larger items. But have you ever considered the airspace above you?

That's where drop ceiling grid hooks come in! With these hooks, you can hang various decorations, including hanging plants, banners, Halloween or holiday garlands, and more.
To install, simply slide the hooks onto the grids in the correct configuration, and you're good to go. No other hardware or tools are required!
🔎 RELATED ARTICLE: Transform Your Drop Ceiling with These Creative Decor Ideas

Bear Claw Screws
Let's move on to screws. This one is a versatile option that's perfect for beginners trying to hang a frame on the wall.
Bear Claw Screws are double-headed, anchorless screws. Essentially, they resemble regular screws but feature an exposed collar, which is the part of the screw where you can hang objects using picture wire, D-rings, sawtooth hangers, or keyholes.
You can use Bear Claw Screws on drywall, lath, plaster, and wood without the need for pilot holes. They can support up to 30 lbs on drywall without an anchor and up to 100 lbs when installed in a wood stud. However, if you intend to install them into concrete, brick, or masonry, a 1/8" pilot hole is required.
To install, simply start by holding up and gently pushing the tip of the screw into the wall. Then, use a screwdriver to further secure the Bear Claw Screw into the wall. That's it!

Final Thoughts
After exploring these 7 picture hanging products perfect for first-timers, it's safe to say that hanging a picture, artwork, a mirror, or any decoration is nothing to be afraid of. Anyone can do it, and it won't take up too much of your time. Before you know it, you might become a picture-hanging expert!
Should you still need a helping hand or have additional questions, email us at support@picturehangsolutions.com. Our team is always ready to help!


Leave a comment (all fields required)