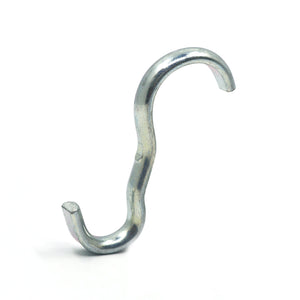
A zinc-plated/ silver finish narrow rail hook for Ogee molding, a.k.a. picture rail systems. Supports up to 25 lbs.
Picture rail hooks are used with Ogee molding or picture rail molding, and nylon or steel cable and picture hooks.
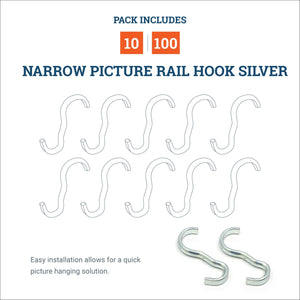
Pack includes 10 Silver Narrow Rail Hooks. Each hook hangermeasures 1 3/4" long, 3/16" wide, and 1/8 inch thick.
The design is made to sit perfectly onto the curves of an Ogee molding and holds the whole system together to create a museum-like photo or art display.
With a picture rail system, drilling holes in the wall is not necessary.
Instructions
Two picture rail hooks per frame should be used.
A second person to assist with hanging is helpful.
Check the fit of your picture rail hooks. You can bend the hooks slightly if necessary to make them fit better.
Strap Hangers or D-Ring Hangers should be installed at the upper corners of frames to be hung, aligned vertically just below the top edge. If the frame is hung from above, the hangers should be placed just far enough away from the top edge to be invisible.
Using picture wire, extend the length of the picture wire from the bottom (smaller) bends of the two picture rail hooks, to the top of the frame on the wall. Wrap the wire tightly around itself to form a tight, compact coil about 1 to 1 1/2" long just below the bend of the picture rail hook; and then clip off any excess wire.
Position the top (larger) bend of the picture rail hooks on the picture rail molding, approximately equal to the width of the frame to be hung. Allow the wire ends to dangle.
Attach the wire from the picture rail hook to thepicture hanger on the right side of the frame and raise it to about the height you want. Hold the left side of the frame with your left hand or, better yet, have someone assist you.
Temporarily loop the picture wire around itself at the picture hanger to hold the right-hand side of the frame in position.
Repeat Steps 7 and 8 on the left-hand side.
Make any necessary adjustments to the position or spacing of the hooks on the picture rail molding. The two wires should be parallel.
If necessary, unloop the wires at thepicture hangers and adjust the wire height up or down until the picture is at the correct height. The picture should be level.
Be sure to coil the picture wiretightly around each picture hanger. Clip off any excess wire.